Let me preface this section by saying once again that I've had essentially no programming training, save a high school class on Java. I've never formally learned Python although I have done a few Codecademy lessons to get me familiar with the syntax. Most of what I know about Python is from Google-ing how to do specific tasks and reading forums. I think that programming in general is really cool because you can throw together blocks of code that other people have written to do things that the original authors never intended.
Here's the GitHub repo for the entire project. This repo includes most of the packages I use for the project. I use Pyserial and Pywin32 as well and I'm not 100% sure how to find the files for those packages since they had installers when I downloaded them. Obviously I'm still learning how this all works.
https://github.com/lindsey-andrade/shortpad
I'll try to break the code down into its main components:
1. Reading Serial
Pyserial is fairly easy to set up. I was a mechanical engineer on a piano playing robot project a few years ago and the magical software engineers used Pyserial to communicate with our Arduino. I knew it was totally possible but I had never done it myself.
Pyserial requires a few lines of setup code that sets the baudrate and port number and then opens and clears the serial buffer. Once you've done all that, you can just use a readline() command to get the incoming serial message.
ser = serial.Serial()
ser.setPort('COM5')
ser.baudrate = 9600
ser.open()
ser.flushInput()
ser.flushOutput()

new = str(ser.readline())
You'd think that printing 'Hello World' from an Arduino would output as 'Hello World' in Python but it's definitely not the case. I'm outputting two strings from the Arduino code on each line, the button number and its state. I'm doing strings because I have 12 buttons and want to label them 01, 02, ..., 12 and integers strip the leading zero when I print them. So the outputs when I look at them in the Arduino Serial interface look like this:
011
021
031
041
051
061
071
081
091
101
111
121
But if you print the Serial output from Python, it looks like this:
b'011\r\n'
b'021\r\n'
b'031\r\n'
b'041\r\n'
b'051\r\n'
b'061\r\n'
b'071\r\n'
b'081\r\n'
b'091\r\n'
b'101\r\n'
b'111\r\n'
b'121\r\n'
So that's annoying. I have to do some substring commands in Python to pull the button number and state out of each line of serial and convert it to an integer. Once I do that, I can set the states to the correct buttons.
Now I always know the current state of the button - whether it is being pushed or not pushed.
2. Know the Active Window
The cool thing about this setup is that the button commands can change depending on what application you're working it and it happens as soon as you switch windows. You could be working in Photoshop and Adobe Illustrator at the same time and want to use the Lasso tool in both. Well in Photoshop the default key command is "L" and in Illustrator it is "Q"... super useful, I know. So you want to switch back and forth between Photoshop and Illustrator and keep the Lasso tool the same in each program. You don't want to have to manually switch you key commands every time you switch programs so this little section of code will help do it for you.
I downloaded Pywin32 to use some really cool Windows functionality. Pywin32 has the win32gui package in it and which you can use to control active windows.
This person "luc" on StackOverflow has a pretty awesome block of code that showed me how to get the names of active windows and set them to the foreground so that my key commands will always work on the top most window.
Through a lot of testing, I found that sometimes you need the full window name and sometimes you only need a small section of it. For example, Chrome tabs need the full name "Messenger - Google Chrome" but Solidworks need this wildcard handle thing that looks like ".*SOLIDWORKS Education Edition .*" which doesn't include the specific file you're working in like this: SOLIDWORKS Education Edition - Instructional Use Only - [Part1]. It's super weird and I have no idea why it does this but when I finally figured out that this was the reason commands weren't sending to certain windows it was definitely a relief.
Here's the code for my sentToActiveWindow() function. It's a weird mix of functions from the StackOverflow code and functions straight from win32gui. The main thing is that it works and returns the full window name so I can play with it later.
from packages.windowswitch import WindowMgr
from win32gui import GetWindowText, GetForegroundWindow

def sendToActiveWindow():
        full_window_name = GetWindowText(GetForegroundWindow()) #only acts on active window
        #don't try this code on the python source while it's running. it hates it
        window_title = full_window_name.split('-')[0]
        wildcard = ".*" + window_title + ".*"

        # this if loop is to make it not possible to type in the Python Shell
        if full_window_name != "*Python 3.4.3 Shell*":
                """
                the following try/except is to get around a weird error when
                switching between multiple window. some full window names would
                not work when put into set_foreground() but some would. either
                it uses the full name of a window (ie "Messenger - Google Chrome")
                or it uses just the first part (ie "Messenger ") to call the window
                forward. it tries the full name first and if that doesn't work it'll
                try the shortened name. unsure why it does this and unsure if this is
                the best solution.
                """
                try:
                        w = WindowMgr()
                        w.find_window_wildcard(full_window_name)
                        w.set_foreground()
                except:
                        w = WindowMgr()
                        w.find_window_wildcard(wildcard)
                        w.set_foreground()

        else:
                print('Do not push the button in this window')

        return full_window_name
3. Knowing When a Button is Pushed
So button states are always coming into Python and Python is always reading the new thing that the Arduino code sends it. Most of the time, the buttons are all at their open "1" state. Kinda boring for Python to always be reading 1s. To tell when a button is pushed, I use an old and new state for each button. Lets just look at button #1 for now.
I initialize button #1 with a "1" because that's the open, unpressed state of the button. This is the old value. When Python is reading the serial outputs, it assigns the state coming in for button #1 as new. Most of the time, new = 1 because the button still isn't pressed. But when new = 0, I know that the button is being pushed down. But if I just had a loop that checked if new == 0, then if you hold a button down you'll continue that loop too many times. So I check if new and old are different (if new != old:) to tell when the button is going from its unpushed to pushed state. Once I know that the button state has changed, I can set the old value to the new value to make sure I don't miss the next change. This change will also trigger the condition when the button goes from the pushed to unpushed state so I throw in another condition: that new == 0 to only get the pressing of the button, not the release.
I use this little bit of code whenever I need to know when to trigger another command when a button is pushed:
if old != new:
    old = new
    if new == 0:
        # put button code here
4. Modifier Keys
Modifier keys are used all the time on normal keyboards. They can be press-and-hold style modifiers like Shift or Ctrl or can be toggle switches like NumLock or CapsLock. Toggles are nice because they actually change what the keys function is while the modifier key is on.
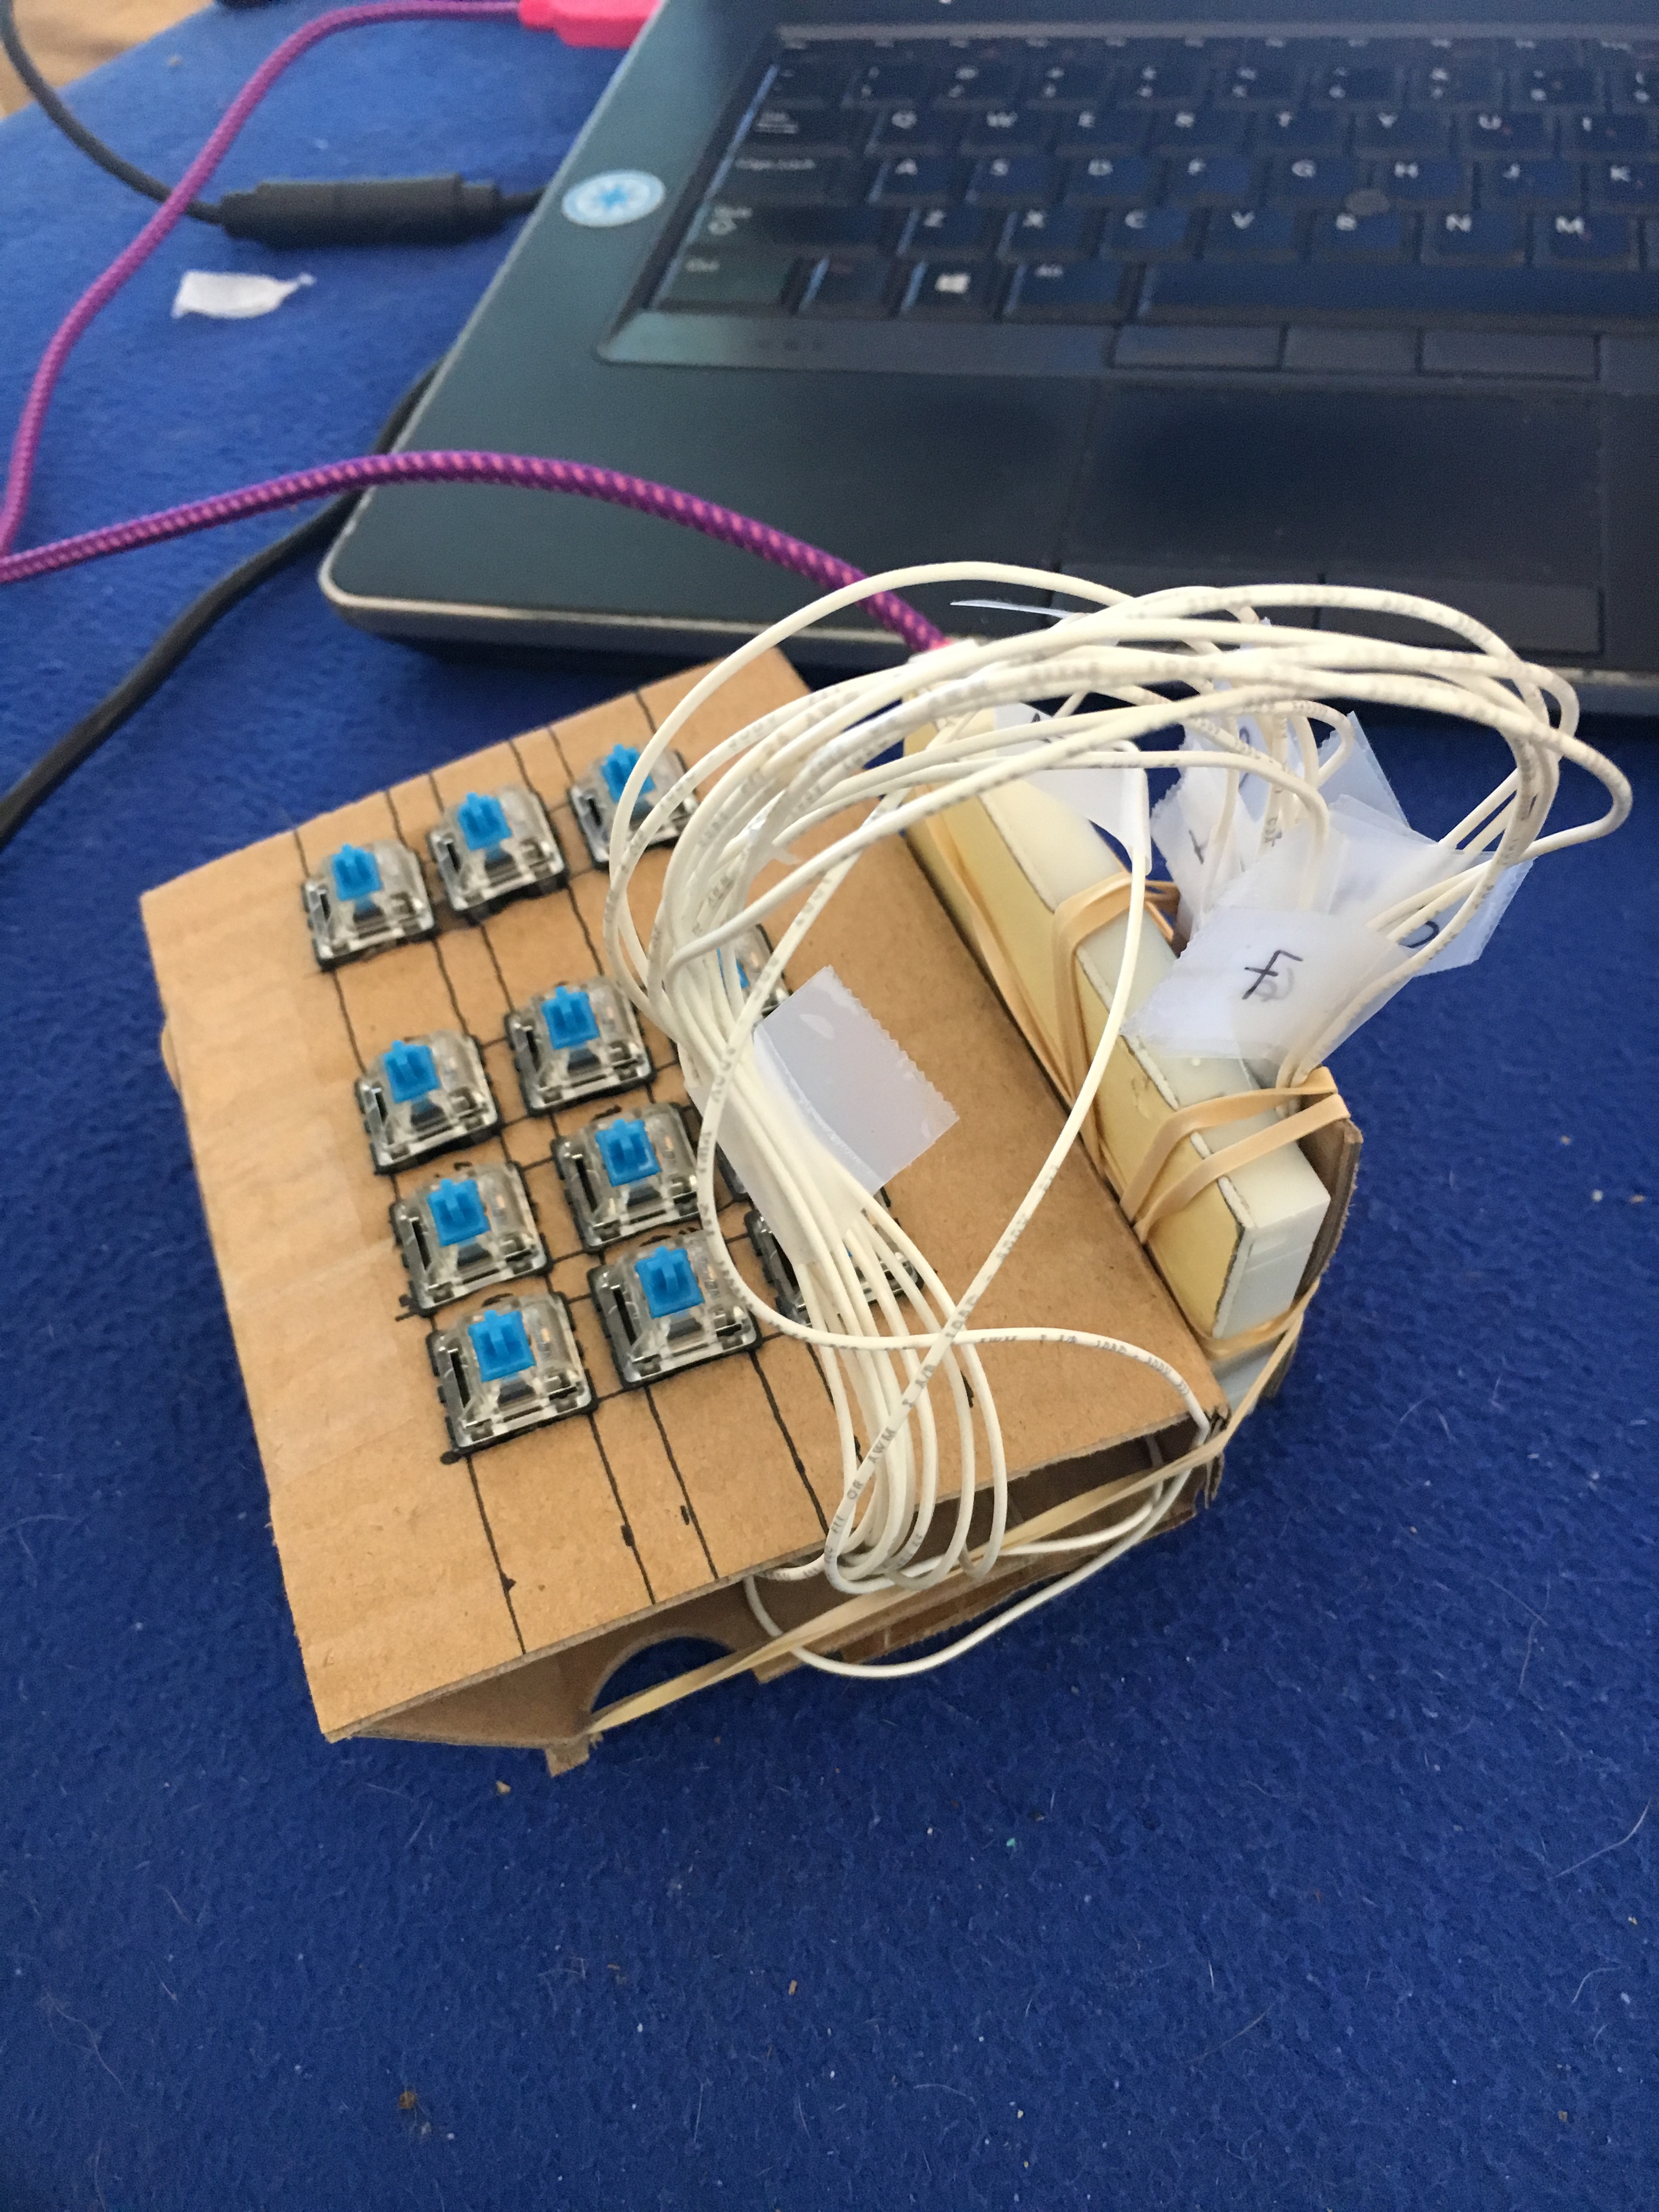
I bought 12 keys: nine 1x1s and three 1x1.5s. So I've got three keys that are about the size of a Ctrl key on most keyboards and nine that are the normal letter key size. I'll use the three larger ones a modifiers and leave the other nine for the keyboard commands.
Nine keys really isn't that much when it comes to programs like Solidworks. My most common keyboard shortcuts are:
-
Boss Extrude
-
Cut Extrude
-
Zoom to Fit
-
Measure
-
Normal To
-
Create a Reference Plane
-
View/Hide Origins
-
View/Hide Planes
-
View/Hide Sketches
-
View/Hide Sketch Relations
-
Equations
I also use the cut/copy/paste commands a lot and hit the ESC key every few clicks. So I've got at least 15 individual commands that I like to use in Solidworks and that means I'll definitely need the modifier keys to allow me to have the same keys give me different commands.
I've decided to keep one modifier key different from the others. The point of my little project is to have all my keyboard commands on a small keyboard so I don't need my left hand on my real keyboard. That means I need a few keys like Shift or Ctrl to help me make selections. I've chosen to make one of my modifiers a Shift key because I use that key a lot in Solidworks (my primary program if you couldn't tell).
So I've got two modifier keys acting as toggles and one acting as a press-and-hold. I can do a number of combinations with the toggle keys but I've restricted it to three: all of them off, one of them on, the other one on. So only one toggle can be on at a time or they can all be off. Sure I could make it so if both of them on I get another modifier state but I figured that would get a little confusing for me.
The code for the modifier keys isn't that complicated or interesting so I wont show it here. But the really cool part (at least I think its cool) is how the buttons "know" which commands to use depending on the active modifier. And I'll talk about that next.
5. Command Buttons
So before I get into how the buttons "know" which command to chose, I'll talk about how the commands actually get sent from Python to whatever window is active. I use another chunk of code from someone on the Internet to utilize the win32gui/win32api (I'm not actually sure where the difference is between these two packages, I think they're packaged together in Pywin32) to send keyboard strokes on command. I've stuck this entire code into its own file in my packages and just reference it in my main code.
I use pressAndHold() and release() for the Shift key, pressHoldRelease() for any key combination like "Ctrl+Z", and typer() for everything else. Definitely take a look at this person's code, it's really well done.
So how do I connect buttons with specific key commands? I used a simple text document that contains the button number, program name, and key for each shortcut I want. The file looks something like this:
4, 'SOLIDWORKS', 'b'
5, 'SOLIDWORKS', 'c'
6, 'SOLIDWORKS', 'n'
7, 'SOLIDWORKS', 'm'
8, 'SOLIDWORKS', 'f'
9, 'SOLIDWORKS', 'g'
10, 'SOLIDWORKS', 'ctrl+z'
11, 'SOLIDWORKS', 'ctrl+s'
12, 'SOLIDWORKS', 'esc'
Why do I start at 4 instead of 1? That's because I named the modifier buttons 1-3 before thinking and it's a lot of work to change it around.
So first, I need to know what program I'm pulling key commands for and this is where my sendToActiveWindow() function comes in handy. The sendToActiveWindow() function returns the active window name so I can pull out all the lines of the text document that match up with the active program. I make a temporary array to store only the button numbers and key commands that are associated active window.
for line in ProgramCommands:
        # pull out the program to test against the active window
        program = line[1].replace("\'", "")
        program = str(program.replace(",", ""))

        if program in activeWindowName:
                # pull out the button and keys from the lines
                # the correct program
                button = int(line[0].replace(",", ""))
                key = line[2].replace("\'", "")

                # create a temporary array to store only the commands
                # for the active window
                temp_array.append([button, program, key])
Once I have an array of only commands that apply to the active window, I can search for the correct button number and then press the key that matches the button number. But before I do that, I apply the modifier keys.
Now I could have a 4th column in my text document that says which modifier state each command applies to. But that's just extra searching and it takes a lot of time to write and execute. So I'll just add more buttons (kind of). If none of the modifier keys are pressed [0, 0], the button number in the text document will correspond directly to the button being pushed. But if the first modifier button is pressed [1, 0], I'll add 20 to the button number being pressed and search for that in my text document. If the second modifier is pressed [0, 1], I'll add 40 to the button number being pressed and search for that in my text document.
So my text document now can look like this:
4, 'SOLIDWORKS', 'b'
5, 'SOLIDWORKS', 'c'
6, 'SOLIDWORKS', 'n'
7, 'SOLIDWORKS', 'm'
8, 'SOLIDWORKS', 'f'
9, 'SOLIDWORKS', 'g'
10, 'SOLIDWORKS', ''
11, 'SOLIDWORKS', ''
12, 'SOLIDWORKS', 'esc'
24, 'SOLIDWORKS', 'ctrl+s'
25, 'SOLIDWORKS', 'ctrl+n'
26, 'SOLIDWORKS', 'ctrl+tab'
27, 'SOLIDWORKS', 'ctrl+x'
28, 'SOLIDWORKS', 'ctrl+c'
29, 'SOLIDWORKS', 'ctrl+v'
30, 'SOLIDWORKS', 'ctrl+z'
31, 'SOLIDWORKS', ''
32, 'SOLIDWORKS', ''
44, 'SOLIDWORKS', 'shift+t'
45, 'SOLIDWORKS', 'shift+p'
46, 'SOLIDWORKS', 'shift+o'
47, 'SOLIDWORKS', ''
48, 'SOLIDWORKS', ''
49, 'SOLIDWORKS', ''
50, 'SOLIDWORKS', ''
51, 'SOLIDWORKS', ''
52, 'SOLIDWORKS', ''
I don't blame you if you can't see exactly what is happening here. I have three ranges of button numbers: 4-12, 24-32, and 44-52. These ranges correspond to the three states possible with the modifier keys. Is it confusing that my initial button states are 4-12 instead of 1-9? Yes. Is it worth changing? Probably. Will I? Maybe.
The code to actually search for the button numbers and actually type them looks something like this:
if modkeyA == 1:
        button_num = button_num + 20
elif modkeyB == 1:
        button_num = button_num + 40

for line in temp_array:
        if line[0] == button_num:
                key = line[2]
                if '+' in key:
                        keys = key.split('+')
                        pressHoldRelease(keys[0], keys[1])
                        print(button_num, key)
                elif key == 'esc': #lol it tries to type "esc"
                        press('esc')
                else:
                        typer(key)
And that's pretty much it. I recommend looking in my GitHub to actually see how this all comes together but that's where the magic happens!